Showing posts with label tutorials. Show all posts

02 December 2013

How to Create a Blog Button with a Grab Code Text Box

I had searched for a solid hour, trying to find the best way to put in a button on my blog. I had accidentally changed the html for the one I had and couldn't figure out how to fix it, so I was stuck trying to figure it out all over again.
 
I had searched a few that gave me an almost-right code, but the text wouldn't show up in the text box for whatever reason, so I had to continue searching. And then, I found the EASIEST way to do it. It's a template that generates the code for you!


Here is what you need to enter into the template:
 
1. Your Title. (name of your blog, website, etc)
2. The link to where you want the picture to click through to (your blog, website, etc)
3. The link of your image (hosted on flickr or photobucket)
 
And that's basically what you need! You have the option of choosing the size of the text box and font colour, etc, but it's more or less done for you!
Easy-peasy, lemon squeezy!!
 
Trees Hide


20 December 2012

Handmade Gift Idea :: Vicks Vapor Shower Disks


I have spent the majority of my lifetime trying to find the perfect man gift - one that is practical and says "I am thinking about you" - in a manly way. And I think I finally found it!


What better way to tell that man in your life that he is special?
It's everything a man needs: practical and helpful.
I found it on Pinterest, and here is the link to the original post.
Here is how it is made:

Recipe:
-2.5 cups of baking soda
-Water
-Essential oils: eucalyptus, rosemary, and lavender.
-Muffin tin
-Muffin liners

Directions:

1. Add baking soda to a mixing bowl.
2. Slowly add water until you've made a thick paste.  Add just a little water at a time.  You'll want the mix to feel like putty.
3. Add 15 drops of each essential oil.
4. Spoon in to a muffin tin, and let sit out for 12-18 hours.  You can also bake these, but I just left them out overnight.
5. Pop these suckers out of the paper liner, plop it in your shower, and let the essential oils steam away your stuffy nose.  Edited to add: put them anywhere on the floor of the shower; it doesn't matter where!

A great way to say to the guy in your life, "You're congested. Here, take a shower disk. This will make you feel better. See how much I love you?"
Trees Hide

19 December 2012

Handmade Gift Idea :: Caramel Sauce

via

Here is another simple and well received gift that you can make for pretty much anyone. I mean, who doesn't LOOOVE caramel? They would not be invited to my house for Christmas, I'll let you that much! lol  All kidding aside, caramel is a great condiment - over apple crisp, apple pie, ice cream, or like one of my friends, just with a spoon!


INGREDIENTS:
1 cup light corn syrup
1 1/4 cups packed brown sugar
1/4 cup butter or margarine
1 cup whipping (heavy) cream

DIRECTIONS:
1. In 2-quart saucepan, heat corn syrup, brown sugar and butter to boiling over low heat, stirring constantly. Boil 5 minutes, stirring occasionally.

2. Stir in whipping cream; heat to boiling. Cool about 30 minutes. Serve warm. Store covered in refrigerator up to 2 months. Reheat slightly before serving if desired.


Trees Hide

12 December 2012

Handmade Gift Idea :: Sugar Scrub

via

On my 101 in 1001 list, number 34 states to Make Christmas gifts for everyone in my immediate family myself - which means my sisters, brothers, and parents.

Now, this gift idea is useful, lovely, and best of all, handmade.


Sugar scrubs are great for gifting, and they are super easy to make! Here's how I did it.

Recipe:
3 cups white granulated sugar
1 cup & 2 tbsp olive oil (unscented)
10 drops of essential oil
Pour the sugar into a large bowl.
Add the olive oil.
Stir until uniform consistency.
If you want to use differenct scents of the essential oils, divide evenly the sugar into separate bowls.
Add 10 drops of essential owl.
Stir it all together.
Spoon sugar into your jar/container.
Decorate container for giving.
The end.

 
Trees Hide

10 July 2012

Sweet & Delicious Homemade Lemonade

It's another scorcher out there today!
So to help you cool down, I thought I'd share with you my favourite way to cool down in the heat!
Homemade Lemonade!

It's so refreshing and delicious, I'm sure you will want to try it too! Here's how I made it:

             1. Put 2 tsp sugar in the bottom of the glass.
             2. Cut a lemon in half and squeeze as much juice out of it as you can into the cup.
             3. Stir the lemon juice and sugar together until the sugar is mostly dissolved.
             4. Throw in a few ice cubes and the lemon you just squeezed.
             5. Top up the glass with ice cold water.

Voila! You've got the best tasting lemonade you ever had!
(If you taste it and it's too lemony, you haven't stirred it enough.) :)

Trees Hide

09 February 2012

Upcycled Hanging Lamp Tutorial

This is my first attempt at writing a tutorial, so forgive my horrible pictures.

I have been needing extra task lighting for my craft closet, since well, it's in a closet. Closets don't usually have lights in them, not closets where I come from, anyway. So I knew I had to hunker down and make a lamp. And here is what I came up with:


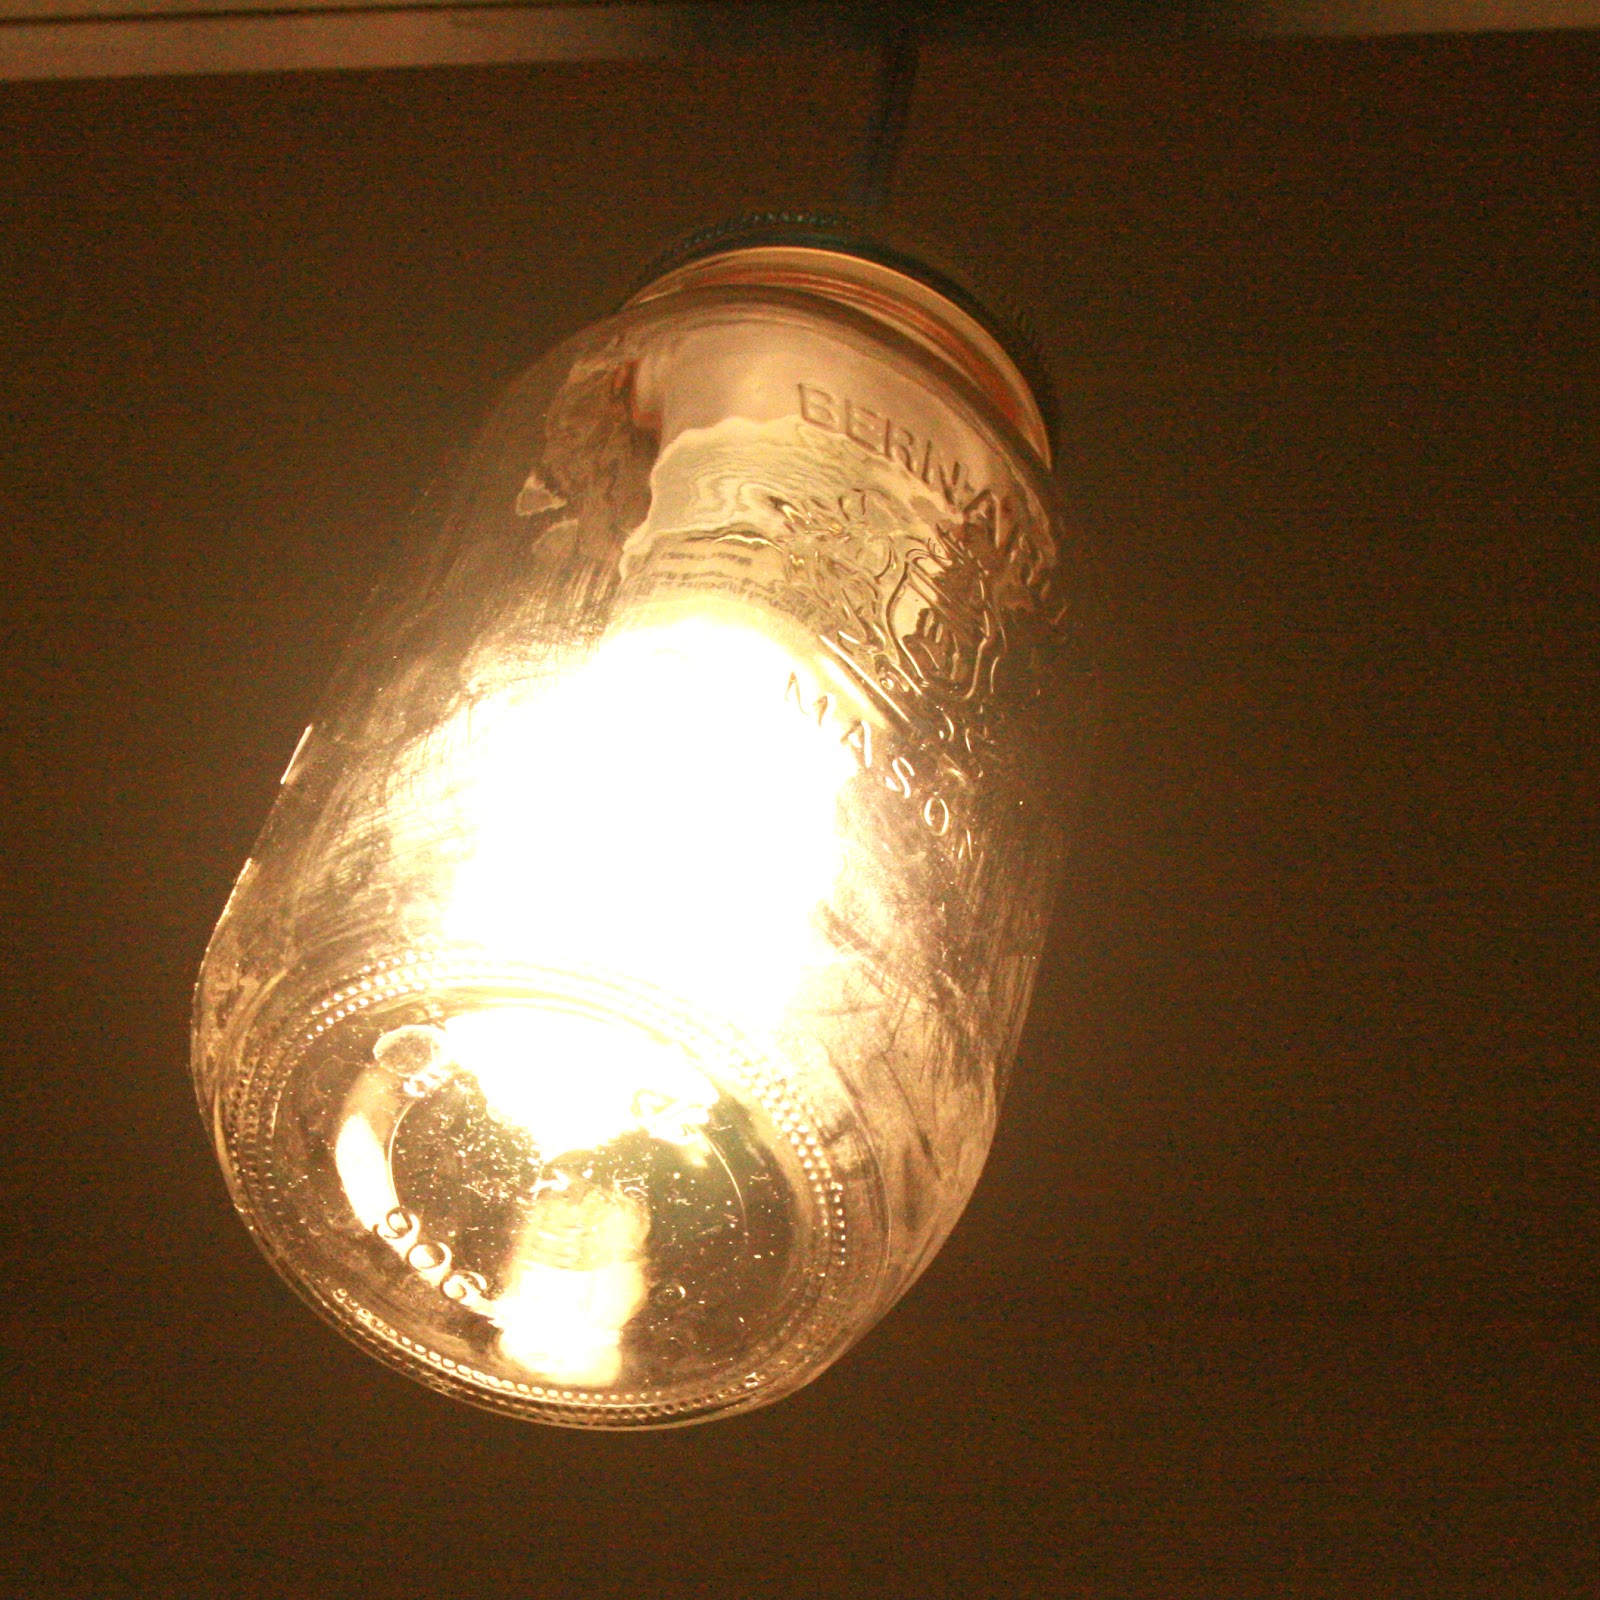
Yes, dear readers, I made a mason jar into a lamp. I know you've probably seen these around, and I have too. And I wanted to make one. Now, I have to tell you now, my husband did help me. But that's only because he doesn't trust me with his power tools. But after this process, maybe I shouldn't trust him with power tools, either (just kidding).

For this lamp, I used only items that we had in the house - I didn't have to go get anything! I started with a lamp I got from Ikea that had broken and a clean mason jar.


1. Unscrew the thing you put the light bulb in out from the lamp.
2. Trace the size of the hole onto the mason jar lid.
3. Drill a hole in the mason jar lid. (as you can see, it didn't turn out so well. But this was the only lid of that size that we had, so I just had to go with it.) This is the part that Jeff did. It was really difficult to do this part, since the lid would just spin with the circle drill thing. So we used clamps to hold it down, so it wouldn't move. That's why the lid is not flat anymore.


4. Put the mason jar lid parts together. Be careful that you don't cut your finger! I had to re-flatten the lid a bit, since it was sort of mangled once Jeff was done with drilling a hole into it. Stick the thing you put the light into through the hole of the mason jar lid.
5. In my case, I had something else to screw onto the first thing from the other side - to keep it secure.
6. Put the light bulb into the thing - fluorescent all the way, baby!


7. Put the light thing into the mason jar and close the lid.
8. Presto! You have made your lamp!
9. Hang in on the wall. I won't tell you how I hung mine up, you'll only laugh at me. (I used a stapler gun.)

The end!

I hope you have enjoyed this tutorial as much as I enjoyed writing it, and I hope this inspires you to try to make your own lamp!

Trees Hide